Download an Easy Icon Maker. Likely, we would be inclined to seek a program that will assist us in doing so in a way that is the least costly.
IcoFX is an appropriate program to those who want to easily convert an image in his or her PC into an icon. It could be a PNG, JPEG, GIF, or any other image file, and all one has to do is to drop it in the program. It will then present itself with the options of creating an icon. Select one and make your image a icon. Through the traditional save procedure, you may save it to the desktop and you have created an icon.
Installation: The downloaded file is portable, hence it does not require installations. All you need to do is to click the IcoFX2.exe file on the ZIP folder and it will execute.
- Software Programmer: Attila Kovrig.
- Working Compatibles: PCs and Laptops.
- File Size: 9.1 MB
- Operating System Compatibility Windows (XP, Vista, 7, 8, 10)
- Language: English
- Version: 30-day trial version
- Price: $32
How to Use It?
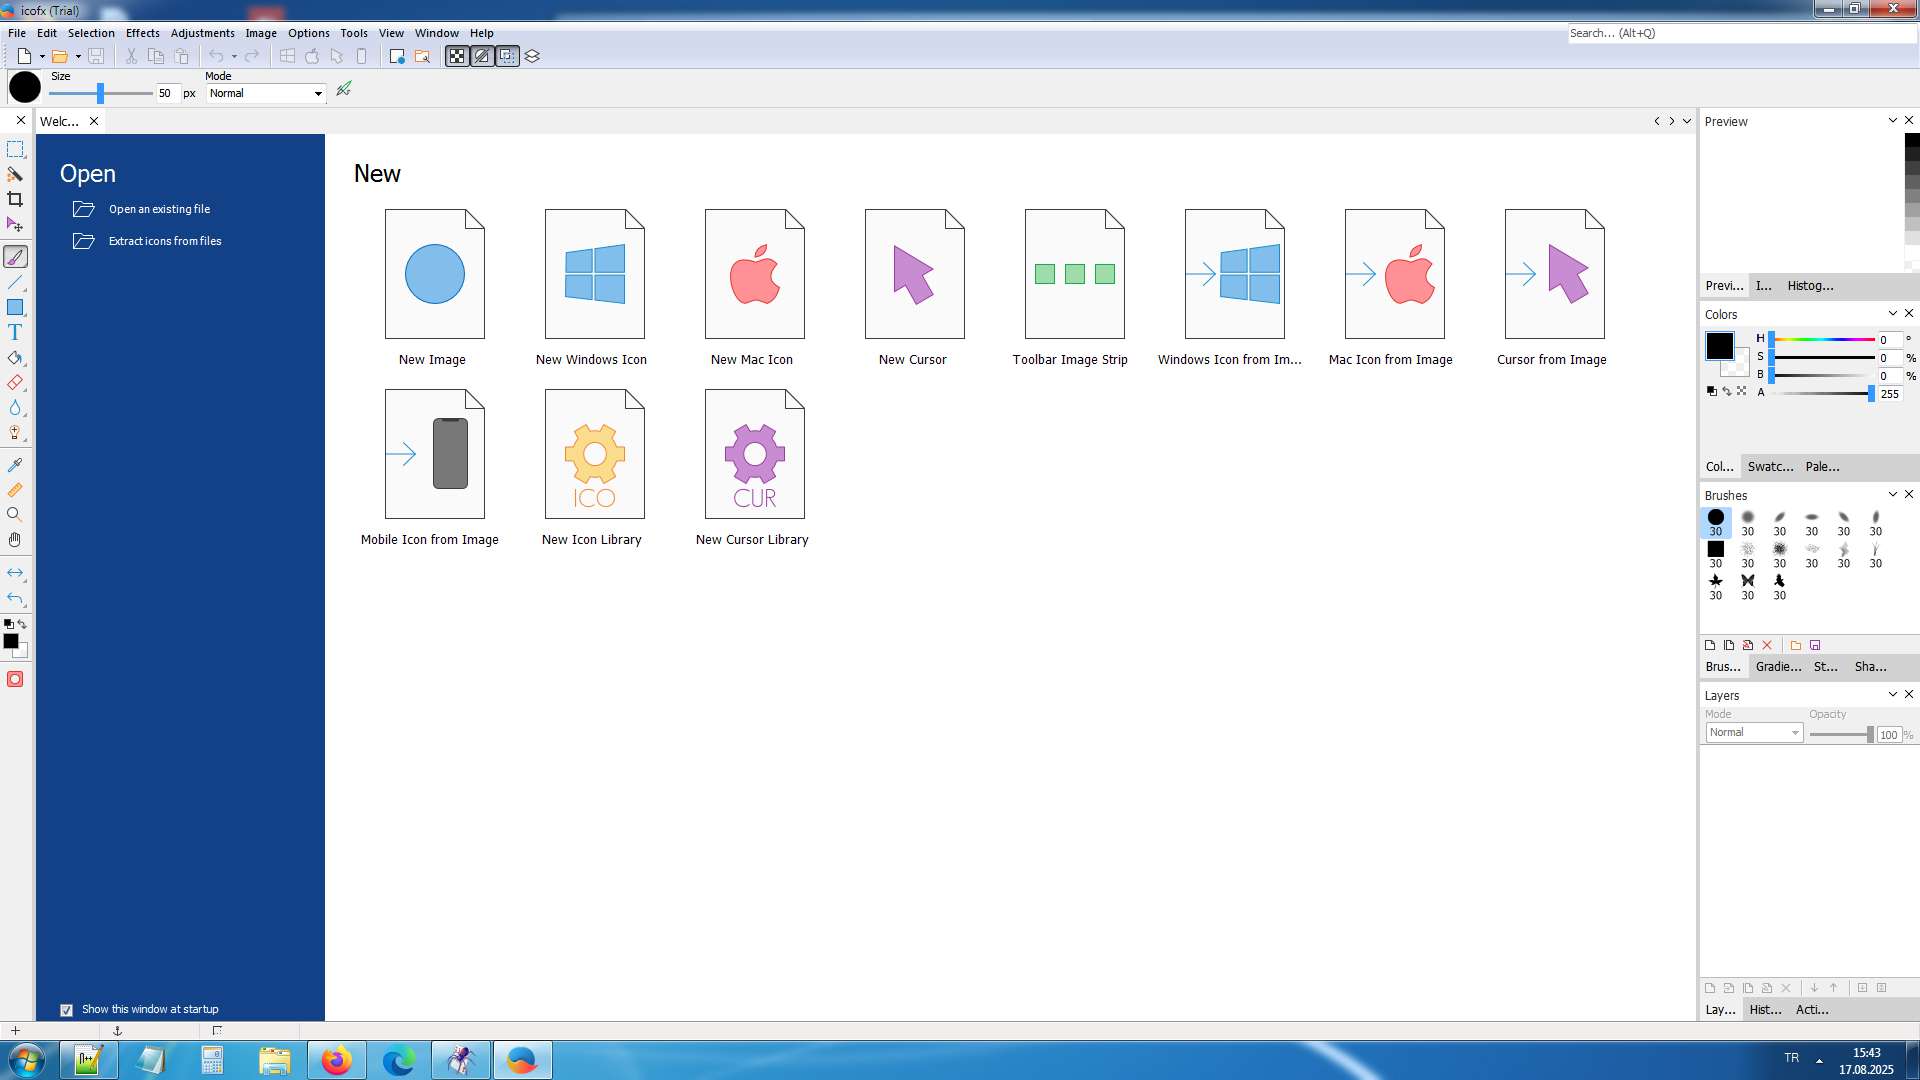
The easiest icon maker in its category is the IcoFX icon maker. Drag an image of your choice on the desktop to the application area of the program. Four options will be seen in a window that will open:
Open as an image: Allows you to open the picture of which you wish to add.
Make an icon out of the image: It turns the dragged image to an icon. It displays 8 sizes of icons; you are able to choose and save an icon size. By so doing, you find it easy to transform an image into an icon. (Sizes: 16×16, 20×20, 24×24, 32×32, 40×40, 48×48, 64×64, 256×256)
Make a cursor: It will make just one 32×32 favicon to be used on the websites. It is something that can be saved without adjustments.
Make it an animated cursor of the image: Gives you the opportunity to open the image by being able to crop it on any side. This will bring up a second options window; by clicking on the (Show the Import dialog for more options) there, the image cropping area will be opened. It will allow you to cut the picture at an edge you wish, to make another icon.
Note: What I have mentioned above enables you to easily draw icons through IcoFX program, however, you may wish to do more. In other words, there is some manipulation of the image. You are able to edit the image with editing features or you can create an icon of your own by opening a blank page and not using any image. To that, we may proceed to a more detailed description:
What’s in the menu area?
File: Here, the file open, file save or file add operations can be done without using the mouse.
The editing choices of the IcoFX program are available here. You can do them here, in case you are not using any copy-paste, delete or cut keys on the keyboard.
View: Within the View tab, you have an option of viewing or hiding the tools in the software. Chosen tools are displayed on the application screen when they are deselected they vanish off the screen.
Effects: This is another area that you are likely to utilize a lot. These include tabs to make different settings on the icon image such as the color, adding shadows, brightness, etc. Other settings that you can make on this tab are: (Color change, embossing, blurring, sharpening, cropping, painting with light, fading, etc.)
Image: This option has the settings of adjusting the tonal balance of the image. Adjustments available here are: (Brightness/ Contrast + Hue/ Saturation + Color Balance + Desaturate + Resize Icon + Dim + Add Shadow + Rotate/ Flip)
I will not elaborate the other menu group items such as settings and help since they are usually common items.
We shall now examine the editing menu on the left.
The following are the tools outlined by the image on the right. The shortcut keys are also indicated next to the name of the tool.
- Rectangular Selection (Alt +M): This tool is the selection tool. It enables us to pick any part of the picture. Here there are three other selection tools, which are Square, Circle, and Freeform. These are the three that can be selected. In order to access the other options, there will be a small triangle on the bottom right side of the selection icon; you will have to click it to view the other options.
- Magic Wand (Alt+W): It is a tool of easy selection. It gives you the option of clicking on a section on the image that has the same color. Suppose there is a photograph of a car on a yellow ground. Once you have chosen this tool, you will then use the mouse and simply click on the yellow part and then you will have selected all the yellow part except the car. We can remove this space and we are left with the car alone. It’s a very useful tool.
- Crop (Alt +C): This is the tool of cropping. With this tool, you may choose any part of the picture and cut it. To give an example, when only the head of a picture of a person is required, simply use this tool to make a selection of the area of what you want and all the other parts will be cut.
- Move (Alt+ V): This is the picture capturer. We can move the image with the mouse by means of it. In case this tool is not chosen, we are not able to alter the position of the image.
- Brush (Alt +B): This is brush painting tool. To form an icon we may paint any spot in the image with any chosen color. The Pencil (Alt +B) is opened by clicking the triangle, which is in the lower right corner of the Brush icon. Painting is also done using this tool which has a very fine tip of the pencil. That is, it allows you to have the functional ability of a lead pencil.
- Line (Alt +U): This is the straight line drawing tool. There is another tool presented at the corner of this icon (Curve) that draws curved lines. The curve of the line will appear as you are clicking on various points using the mouse.
- Rectangle (Alt+R): This is the tool of drawing a square. It will make a square in whatever color you choose the black box on the very bottom of this menu to. Other tools opening at the corner of this icon are:
a) Ellipse tool (Alt+L): This is used to draw a shape in the form of an ellipse.
b) Rounded rectangle: This is used to draw a square shape and rounded corners.
c) Custom Shape: This will enable one to draw an irregular polygon of your choice. - Text (Alt+T): gives you the opportunity to type on the icon. This tool can be used to create an icon using letters.
- Fill (Alt+F): Fill in the area in which one has selected. In case you have chosen an area using any of the selection tools mentioned above, then you can use this tool to fill it by modifying the color on the black square below. Its sub-option, Gradient (Alt+G), adds a color gradient on the image of the icon between dark and light.
- Eraser ( Alt +E): This is the eraser tool. You are able to delete anything on the icon like with an eraser.
- Blur: Blur is used to blur the image, Sharpen uses it to sharpen the image.
- Brighten: Brighten is a light effect to the icon and Darken is a dark effect.
- Color Picker (Alt+ I): This option allows picking any color on the image. In whatever color you choose, the chosen color box on the bottom of the menu turns into that color. In this manner, you are able to choose a color in the picture and apply it to the icon to make some correction.
- Ruler: This is the ruler tool which will do the measurement of the distance between any two separate points on the image.
- Zoom (Alt+Z): This is a Zoom in or out utility. In order to make a choice, you may opt to either increase or decrease the magnifying glass icons on the top of the image window.
- Hand (Alt +H): Moves the screen around to any part of the image. Through this tool, you are able to see other parts of the image that cannot be seen by swivelling the screen and this would come in handy when the image is too wide or tall.
- Flip tools: By these tools you can flip the picture left-right, up-down.
- Color Boxes: These are the two color boxes. By default the color in the upper area would be black. Whatever you change this, you will paint, draw, and so forth. The color in the lower box allows you to select another alternate color, however to apply this color then you have to replace their positions by clicking the horizontal arrow icon just above the box.
What are you trying to say in the menu section at the right?
The choices that will be offered in the menu on the right side will be various combinations depending on the tool chosen in the left side. As an illustration, in case you have chosen a text tool, then here you can make other specific changes such as font size, paragraph alignment and boldness.
You can email us and ask any questions regarding the use of IcoFX.

Leave a Reply
You must be logged in to post a comment.