IcoFX: The tiny icon-making utility that actually does what it says on the tin.
If you ever looked at your folder icon and wished, for even a second, that it didn’t resemble a sorrowful, beige rectangle you’re in good company. It sounds so easy to just create custom icons for files and folders, but you need something that’s reasonably user friendly, doesn’t require you to obtain an engineering degree to operate. IcoFX could be for you.
Atilla Kovrig’s lightweight Windows application is one that excels at performing one task extremely efficiently: converting your ordinary image files into icons that won’t make you want to tear your hair out. IcoFX is a surprisingly small (9.1mb download that’s already compressed to a portable .zip file so there’s no installer to install) Windows application with only one real job: creating icons from regular images, easily.
Before we continue any further, let’s go over the basics quickly:
- Developer: Atilla Kovrig
- Platform: Windows XP, Vista, 7, 8, and 10
- File size: 9.1MB
- Trial: 30-day free period
- Price: $32/year
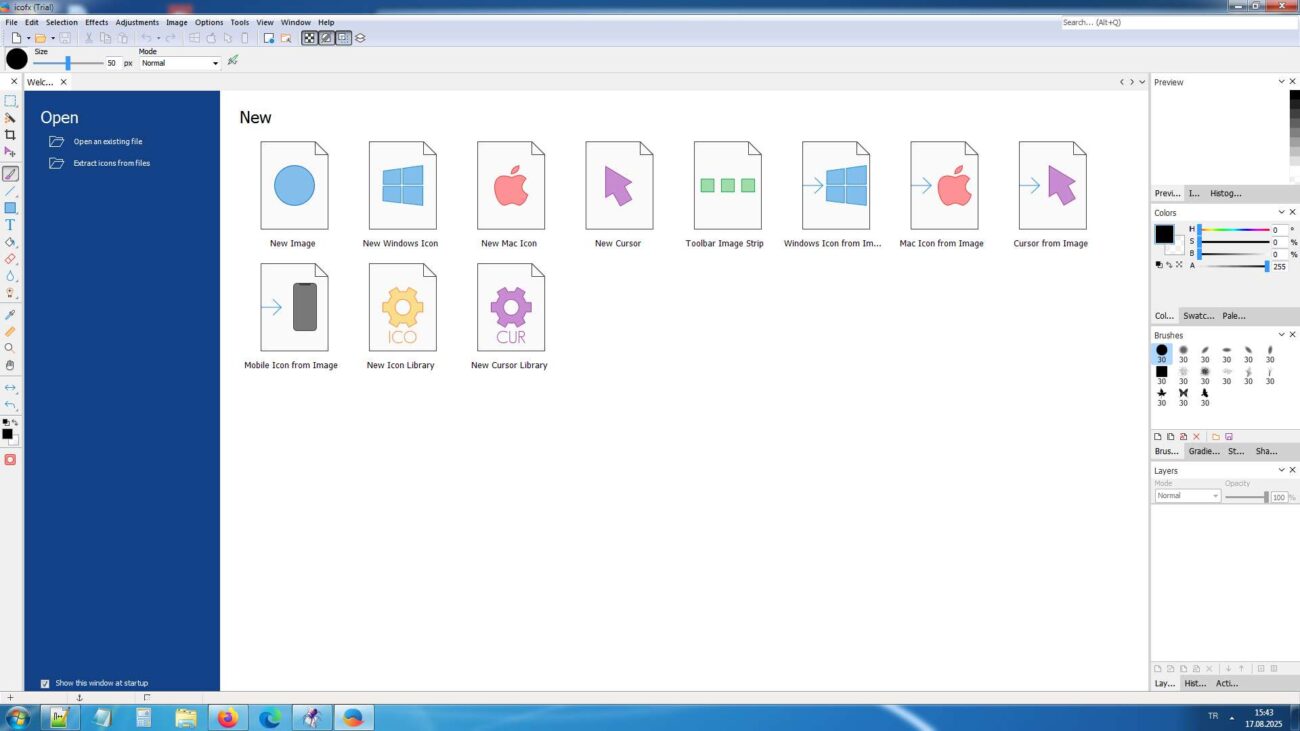
Drag and Drop Action
Here’s where the little application really shines. If you have a PNG, JPEG, or even a GIF image then you simply need to drag the file across into the workspace and then select an action to perform with the image. The four options here are:
- Open as image (no conversions, no funny business, just opens as it always would).
- Create an icon from image (this is what you will likely want. It turns your existing images into icons, with 8 different resolutions created simultaneously: 16×16, 20×20, 24×24, 32×32, 40×40, 48×48, 64×64, and 256×256. After selecting the icon resolution you require just hit save and away you go).
- Create a cursor from image (a direct conversion to a 32×32 sized icon image ready for the web, there’s no editing necessary unless you want to).
For most people that is going to be more than enough. Drag it, select it, save it. Finished.
However, (wait for it), that is just the tip of the iceberg. And not in the “hidden by a stupid ‘features’ page so you don’t know what to get” sort of way. No, in this case there are features, and in the editing realm, they are truly awesome and useful. If you’re the type who likes to tweak everything and see the results of every minute adjustment, IcoFX also possesses a powerful editing suite beneath the surface that you can either use from the beginning or use on an image that you first imported and edited to your desire.
Let’s go over the menus:
Menu Bar
- File – Same old functions you’d find in any program such as Open, Save, or Image Place.
- Edit – Your normal Copy, Paste, and Cut functions (also, again, if you’re not a hot-key master).
- View – Allows you to show and hide tools that you have on the left hand side. Toggle this on, check this, it appears. Turn it off, it’s gone.
- Effects – One of the most used menus. Everything you’d want and need such as Adjustments of Colors, Emboss, Blur, Sharpen, Crop, brightness, and desaturate, are right in this menu.
- Image – Everything else that you might need such as brightness/contrast, hue/saturation, balance, resizing, drop shadow, rotate and flip.
Left Toolbar: What the Editor really consists of…
This contains the bulk of the tool. Below are a list of the tools that this contains and there hot-keys in parenthesis.
- Rectangle selection (Alt+M) – As the title says this is the basic selection tool. There are actually 3 modes this tool can take place in. In the corner of the tool box there is a tiny black triangle; click it to switch between a rectangle selection, an oval selection, and a freeform selection tool.
- Magic Wand (Alt+W) – Possibly the most fun tool to play with. Simply select a color within an image, and it picks every bit of that color in the image with just the click of a button. Need to take off a white background? Click the white, hit the Delete key, and there you go. This tool definitely makes you feel like you know what you are doing.
- Crop (Alt+C) – Lets you draw a rectangle to crop the image to only what you’d like to see.
- Move (Alt+V) – Allows you to pick up and move an image.
- Brush (Alt+B) – Paints with your selected color over any part of the image. Click the little triangle in the corner to select the Pencil tool – same idea but with a much finer tip for detail work.
- Line (Alt+U) – Draws straight lines. Expand the tool for the Curve tool which allows you to bend lines by clicking on points of a path.
- Rectangle (Alt+R) – Draws a colored rectangle in your current color selection. Expand it for more options:
- Ellipse (Alt+L) – Draws circles and ovals.
- Rounded Rectangle – Same as the rectangle, but with rounded edges.
- Custom Shape – Freehand polygon tool when a simple rectangle will not suffice.
- Text (Alt+T) – Lets you place type on your icon image. A must-have for creating monogram-style icons or initial icons.
- Fill (Alt+F) – Fills the selection or area with the current color. Expanding it reveals the Gradient tool which applies a smooth black to white (or the current color to white) gradient.
- Eraser (Alt+E) – This one should come as no surprise.
- Blurring and Sharpening tools – Soften your image at the edges with the blur tool or create emphasis by adding crisp lines with the sharpening tool.
- Brightening and Darkening tools – Lighten or darken specific sections of the image with this one tool.
- Color Picker (Alt+I) – Picks a color from an area of the image and adds it to the foreground color slot. Really useful if you need to pick up a color that already exists in the image for use elsewhere.
- Ruler – Measures the distance between any two points of your image. Actually very useful.
- Zoom (Alt+Z) – Use the magnifying glass icons above the image window to magnify or shrink the view of your image.
- Hand (Alt+H) – When the image is zoomed in, and you can’t see a part of the image because it’s off screen, the hand tool can drag it around for viewing.
- Rotational tools – Flips or rotates the image in any direction.
- The Color Boxes – At the bottom of the toolbar there are 2 colored boxes. The top color is your active foreground color-the color you are going to paint, draw, and/or fill with. The bottom box is your secondary color-you can flip these two around by pressing on the little arrow in between them.
- Mask Tool – This is arguably the most advanced feature in the IcoFX toolbar. Draw a shape over any part of your image, and edits will be made to only the selected mask. If you are interested in doing something like editing only someone’s eyes in a picture and replacing the color without disturbing any other part of the photo, this would be your go-to tool.
The Right Panel
The Right Panel is context-sensitive and minimalist. Depending on what tool is selected on the left panel of IcoFX, the Right Panel displays only what is needed for that specific tool. If you select the text tool then only font size and alignment options are displayed. The same goes for the other tool types-the right panel will only provide options relevant to what tool is currently being used, which helps with the clutter.
The Bottom Line
The IcoFX won’t win any awards for flashy design, but what it can do, it does extremely well. If you’re just looking to convert your existing images into icon format quickly and easily, or sit down and create custom icons from scratch then IcoFX will get the job done and won’t make you sweat while doing it. IcoFX offers a fairly generous 30 day free trial which gives you enough time to figure out if the 32 dollar per year cost of the program is worth it, and I’m going to go on a limb and say for anyone doing icon-based work on a semi-regular basis, that it is worth it.
Do you have any questions about IcoFX? Please leave them in the comments below.