Keeping photo quality when transferring from iPhone to computer.
I’ve been on iPhone for years. And somewhere along the way I picked up enough about photo transfers to know that most people are messing this up without realizing it. Not because they’re careless, just because nobody ever told them.
You spend real time getting a shot right. Good light, good angle, you wait for it. Then you drag it over to your computer the wrong way and something happens to it. Colors get a little flat. The sharpness isn’t quite there. And you don’t notice right away, but eventually you look at it on a bigger screen and think, huh, that’s not what I saw on my phone. Then you start blaming the camera. I’ve done it myself. Took me an embarrassingly long while to figure out the camera wasn’t the problem.
So here’s what I’ve learned.
First thing: stop sending photos through email or WhatsApp if you care about quality. I know it’s fast. I know it’s what everyone does. But both of those apps compress your images on the way out and you don’t get a warning or a choice, it just happens. You tell yourself “it’s only a few photos” and move on. But the original file is gone. What you got on the other end is smaller, worse and that’s permanent. I caught this first with ProRAW files I was pretty proud of. The shadow detail I’d worked to capture was just… not there anymore. Completely gone. That was the last time I used WhatsApp for photos. If you have to use them, dig into the settings and find the option to send files without changes. But honestly, I don’t even bother with that. I just don’t use them for this.
HEIC vs JPEG and why it actually matters.
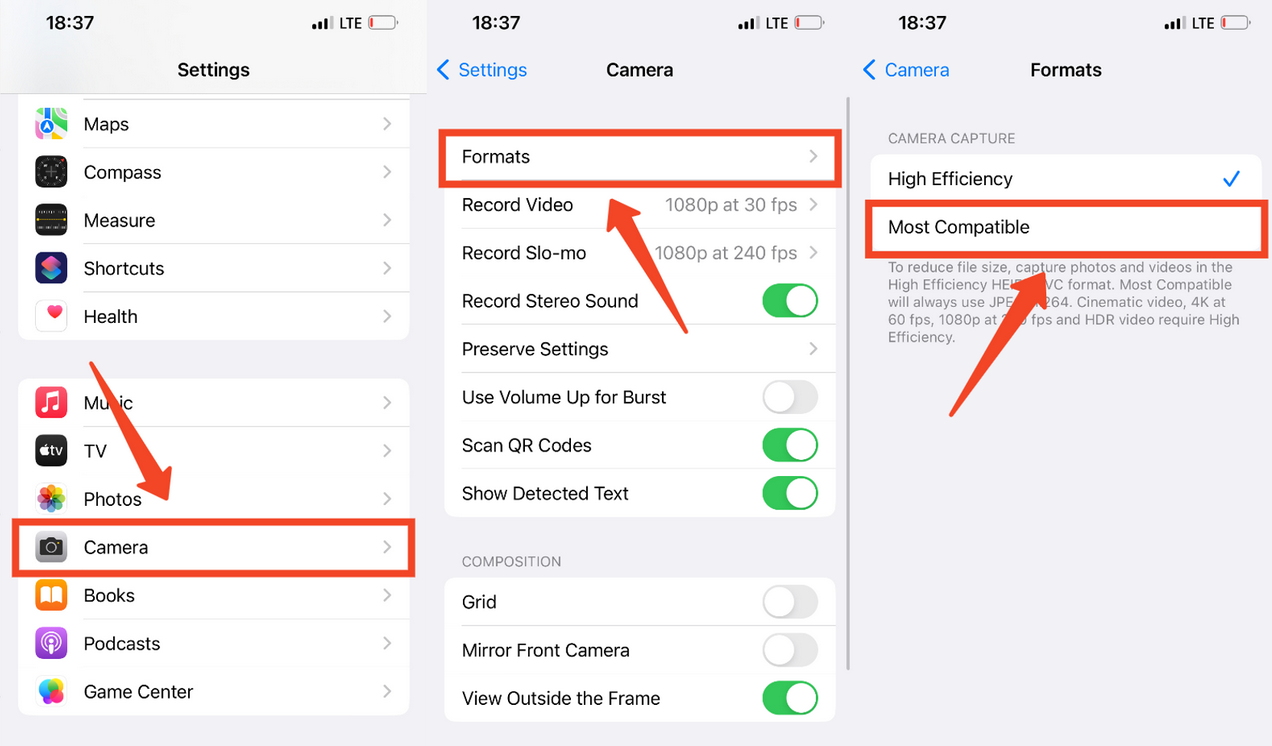
iPhone shoots in HEIC by default. It’s a good format. Keeps the file size reasonable without throwing anything away. The problem is Windows doesn’t always know what to do with it, so people convert everything to JPEG and call it a day. That’s a real mistake.
JPEG is lossy. Every time a file gets saved as JPEG, some detail gets dropped to make it smaller. And you can’t get that back. There’s no undo. So if you’re converting your photos to JPEG just to make them easier to open, you’re doing permanent damage for the sake of convenience. What I did instead was install Microsoft’s HEVC Video Extensions on my Windows machine. It’s literally a few dollars. Takes five minutes, I think I paid $0.99 and after that HEIC files just open like anything else. Worth it without question. Just make sure your iCloud settings are sorted out first, because if they’re wrong, none of this other stuff matters anyway.
The iCloud setting that most people never check.
This one’s quiet. You’d never know it was a problem unless someone told you. If “Optimize iPhone Storage” is turned on, your phone isn’t keeping full resolution photos locally. It keeps smaller preview versions and stores the originals in the cloud. So when you grab photos off your phone, you’re getting the previews. Low quality and you have no idea.
The fix is just turning on “Download Originals“. In iCloud for Windows or the macOS Photos app, it’s in the settings. Flip it on. That’s really it. On my phone I have “Keep Originals” turned on in Settings and in iCloud I have full resolution downloads active. Every transfer comes out the same quality as what I shot. Set it once, never think about it again.
What about just using a cable?
Totally valid. Plugging in and copying directly cuts out all the cloud stuff entirely. No settings to second-guess, no compression, just files moving from one device to another. It’s the most straightforward method there is. The reason people don’t default to it is just that it’s more physical and more manual. You have to be at your desk, you have to find the cable, which, in my case, is always buried under something. Not a big deal, but it’s one more step.
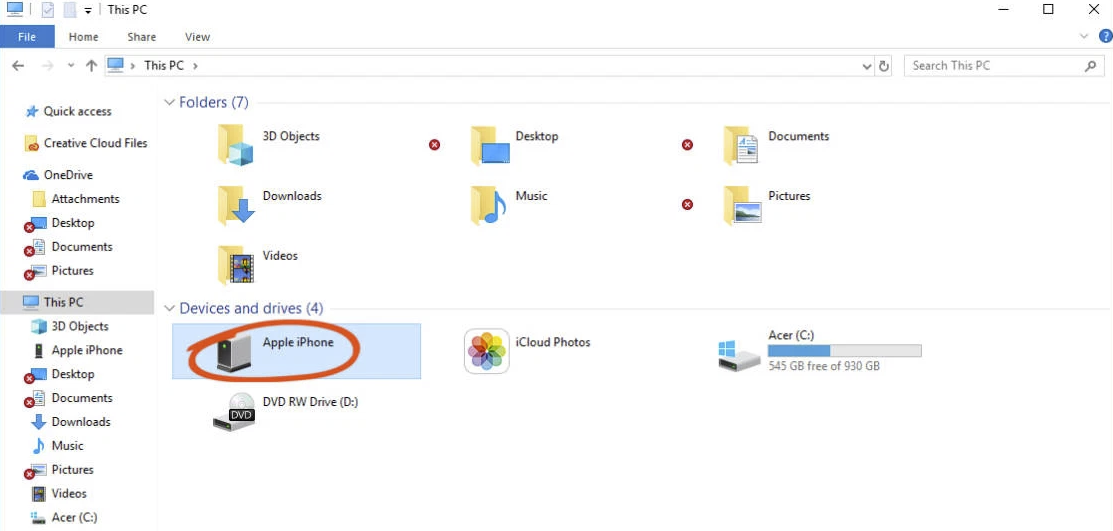
If you want to do it: plug in your iPhone with USB-C or Lightning, tap Trust on the prompt that comes up, unlock your phone and open This PC on Windows. Your iPhone shows up like a flash drive. Open it, find the DCIM folder and your photos are all in there. Copy them over however you want.
One habit I’d actually recommend: inside DCIM you’ll find subfolders called things like 100APPLE, 101APPLE. Don’t just dump those on your computer as-is. Take a minute and sort them yourself by year and month. 📁 2026 -> 📁 2026-10 -> October photos in there. Sounds like extra work. It isn’t really. And the first time you need to find a specific photo from eight months ago, you’ll be glad you did it. Anyway. That’s the whole thing. The phone takes good photos. The question is just whether you let it stay that way on the way to your computer. A little attention to the method goes a long way.