
Move pictures out of IPhone to the computer without the loss of quality. Learn about the right terminology to use with the cable, the iCloud and HEIC.
How to Move the Photos in iPhone to Computer without the Quality.
I have been using an iPhone quite a long time, and I would like to tell about my experience and knowledge of how to transfer photos off an iPhone into a computer. Most individuals are extinguishing the quality of their videos or pictures when transferring them without knowing. It is literally true that the sunset pictures, portraits or low-light pictures you are taking, must be sharp as well as high-resolution. But, when you transfer those photos to your computer and accidentally pick the wrong method, the colors dissipate, the pixels alter and your beautiful photos, well taken with such effort, come out looking like they were on an old phone camera. You may even begin to reason, my phone does not take nice pictures anymore. The thing is that everything is not as bad as it is.
The most prevalent error in this aspect begins with sending pictures using email or messages application such as WhatsApp. These services finish this transfer compression of images, which results in quality loss. You may not be aware that there is any loss in quality and may think that it is just three photos, but at that time the file is compressed and the original quality is lost and your pictures become low quality photos as such as you never intended. I initially observed that with ProRAW files. The realism in the shadows was entirely lost. The first advice I would give, therefore, is never send your pictures through email or WhatsApp messages. Alternatively, I would also suggest that you carry out the ability of the original quality image or like button in your WhatsApp or mail account settings to avoid the loss of the image quality- that is what I did. Nevertheless, I still do not send my photos through these two ways. You should do the same!
Take Notice in the Difference of HEIC and JPEG to be transferred!
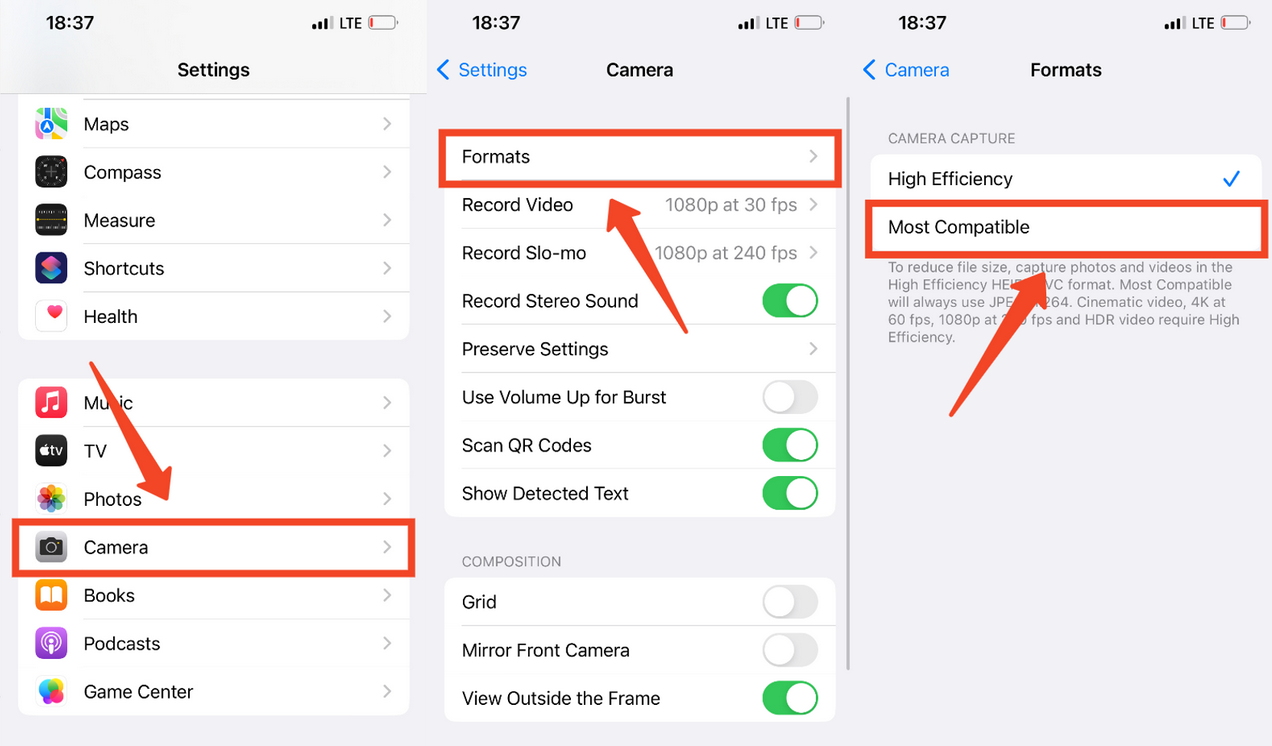
Most of the photos are saved in the HEIC format in the iPhone. The type is very efficient as it saves space and maintains quality. But since there are computers that cannot open it, we instantly tell them to simply make it JPEG. That is where the difficulty starts.
JPEG is a lossy compression, i.e. it deletes invisible bits. As such, all you can do is once you turn a picture into JPEG; you have no possibility of retrieving those details. Therefore, when moving the photos in your iPhone to your computer, you must not convert the HEIC files. Rather I would suggest that you install an HEIC viewer or codec component on your computer. As an example, downloading the windows package of Microsoft called HEVC Video Extensions, everything returns to normal. That’s what I do. It may be paid a little fee, and I believe it is worth it. But yourself, before proceeding to this, you need to make sure your iCloud preferences are right. Since any environment that brings loss of quality will make all your efforts a futile undertaking.
What iCloud settings should you have to get high quality photo transfer?
In case you want to move pictures out of your iPhone to your computer and preserve quality, then utilizing iCloud Photos without modifying the synchronization alternatives is a significant error. With the Optimize iPhone Storage option on, your iPhone has been storing small-resolution photographs. The complete files are only stored in the cloud. That is why once you download and transfer the picture you are looking at on your phone at that moment to your computer, you accidentally receive the low-quality version.
Hence, this can be corrected by proper setting. E.g., when you are using the application iCloud for Windows or the Photos application on macOS, you are better off turning on the Download Originals feature in the settings. In this manner, photos are moved to your computer without being lost in any manner.
As an example, the proper iPhone settings include the following: I have the keep originals option turned on in the Settings, and the download full resolution option turned on in the iCloud. In this manner, I receive equal quality transfer-wise. You should do the same!
You would say, “Would not it be more convenient to have the photos directly through a cable connection without all this? Naturally, this is the surest technique, but the manipulation with cables is not the favorite of all people due to its clumsiness. Nevertheless, I wish to elaborate this technique to people who are not bothered with this additional step.
Transferring Photos on iPhone to Computer via a Cable: This is how:
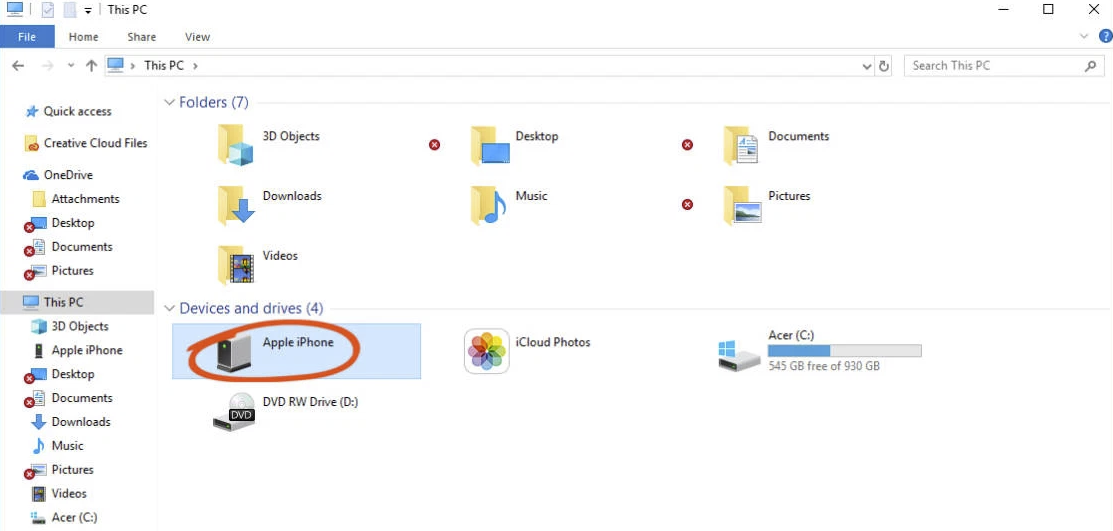
Firstly, you should use a USB-C or Lightning cable to connect your iPhone with your computer. When connected to it via windows, you get a notification on the display. It will tell you, Trust this computer? At this point, tap on your iPhone screen the Trust button and unlock your phone. After that, you will find your iPhone on your desktop when you open This PC as an external drive.
In order to exchange files, it is necessary to click twice on the icon of your iPhone on the computer. There will appear a window, inside there will be a folder called DCIM- all your photos are here. The final thing you would be required to do here is simply to copy-paste the pictures into your computer.
But there is one more tip I can offer. You will find that in DCIM, there are subfolders such as 100APPLE, 101APPLE. The best pieces of advice I can give is that you should not copy these folders but you should create your own folders per year and month.
For example, like this:
2024- 2024-10 – put the photos that you made in October inside. This is the only reason why it is much easier to find a particular photo in the future.
As you may observe, it is not that hard to maintain the quality of photos that you have taken on your iPhone and transferred them to your computer. It is all you have to do is to watch your approach and decisions. Nevertheless, it is important to bear in mind that the surest way is transfer of pictures through cable. I would recommend you to read this, in case you are a cautious person.

Leave a Reply
You must be logged in to post a comment.